The Art of Fermentation - A Masterclass
Dan Saladino gets a practical masterclass with the world-renowned teacher and author of 'The Art of Fermentation' - Sandor Ellix Katz.
Presenter: Dan Saladino
Producer: Rich Ward.
Last on
More episodes
Previous
Next
Over to you: A step-by-step fermentation guide by Sandor Katz.
In the programme we focus on two salting��techniques - dry salting and brining. Here's a written guide to these��by Sandor Katz, plus a fermented fruit drink. Let us know how you get��on.
�շɾ��ٳٱ��:��������
Instagram: ����
email: thefoodprogramme@bbc.co.uk��
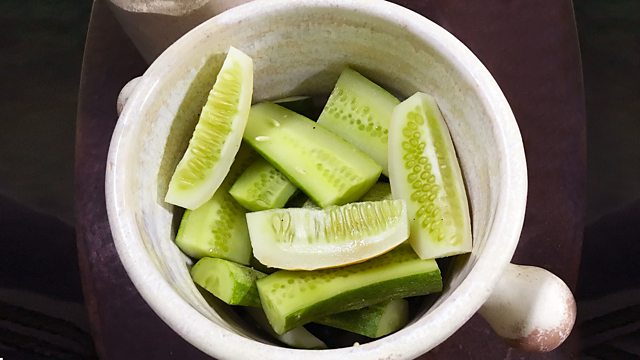
THE DRY SALTING TECHNIQUE
SAUERKRAUT:
For me, it all started with sauerkraut. I’d always loved it as a kid in New York City, almost as much as I loved sour pickles. When my first year of gardening in Tennessee produced an abundance of cabbage, I made my first batch of sauerkraut. Sauerkraut is generally thought to have originated in China and spread westward via the Central Asian��nomads. It is prepared in any number of regional styles. In Croatia and elsewhere in Southeastern Europe, cabbage is generally soured whole, in great barrels. A Russian variation uses apples or cranberries to sweeten the kraut. Germans are so strongly associated with sauerkraut that they are known, in derogatory slang, as Krauts, and when the United States was at war with Germany, sauerkraut was temporarily dubbed liberty cabbage.
The fermentation of cabbage into sauerkraut is not the work of a single microorganism. Sauerkraut, like most fermentations, involves a succession of several different organisms, not unlike the life of a forest, in which a series of different trees follow each other as the dominant species, each succeeding type altering conditions to favor the next. The fermentation involves a broad community of bacteria, with a succession of different dominant players, determined by the increasing acidity.
Do not be deterred by the biological complexity of the transformation. That happens on its own once you create the simple conditions for it. Sauerkraut is very easy to make. The sauerkraut method is also referred to as dry-salting, because typically no water is added and the juice under which the vegetables are submerged comes from the vegetables themselves. This is the simplest and most straightforward method, and results in the most��concentrated vegetable flavour.
Timeframe: 3 days to 3 months (and beyond)
Vessel: 1-litre/1-quart wide-mouth jar, or a larger jar or crock
Ingredients (for 1 litre):
- 1 kilogram of vegetables per litre/quart, any varieties of cabbage alone or in combination, or at least half cabbage and the remainder any combination of radishes, turnips, carrots, beets, kohlrabi, Jerusalem artichokes, onions, shallots, leeks, garlic, greens, peppers, or other vegetables
- Approximately 1 tablespoon salt (start with a little less, add if needed after tasting)
- Other seasonings as desired, such as caraway seeds, juniper berries, dill, chilli peppers, ginger, turmeric, dried cranberries, or whatever you can conjure in your imagination
��
Method:
- Prepare the vegetables. Remove the outer leaves of the cabbage and reserve. Scrub the root vegetables but do not peel. Chop or grate all vegetables into a bowl. The purpose of this is to expose surface area in order to pull water out of the vegetables, so that they can be submerged under their own juices. The finer the veggies are shredded, the easier it is to get juices out, but fineness or coarseness can vary with excellent results. (Fermenting whole vegetables or large chunks requires a saltwater brine; see Brining, below.)
- Salt and season. Salt the vegetables lightly and add seasonings as you chop. Sauerkraut does not require heavy salting. Taste after the next step and add more salt or seasonings, if desired. It is always easier to add salt than to remove it. (If you must, cover the veggies with dechlorinated water, let this sit for 5 minutes, then pour off the excess water.)
- Squeeze the salted vegetables with your hands for a few minutes (or pound with a blunt tool). This bruises the vegetables, breaking down cell walls and enabling them to release their juices. Squeeze until you can pick up a handful and when you squeeze, juice releases (as from a wet sponge).
- Pack the salted and squeezed vegetables into your jar. Press the vegetables down with force, using your fingers or a blunt tool, so that air pockets are expelled and juice rises up and over the vegetables. Fill the jar not quite all the way to the top, leaving a little space for expansion. The vegetables have a tendency to float to the top of the brine, so it’s best to keep them pressed down, using one of the cabbage’s outer leaves, folded to fit inside the jar, or a carved chunk of a root vegetable, or a small glass or ceramic insert. Screw the top on the jar; lactic acid bacteria are anaerobic and do not need oxygen (though they can function in the presence of oxygen). However, be aware that fermentation produces carbon dioxide, so pressure will build up in the jar and needs to be released daily, especially the first fewdays when fermentation will be most vigorous.
- Wait. Be sure to loosen the top to relieve pressure each day for the first few days. The rate of fermentation will be faster in a warm environment, slower in a cool one. Some people prefer their krauts lightly fermented for just a few days; others prefer a stronger, more acidic flavour that develops over weeks or months. Taste after just a few days, then a few days later, and at regular intervals to discover what you prefer. Along with the flavour, the texture changes over time, beginning crunchy and gradually softening. Move to the refrigerator if you wish to stop (or rather slow) the fermentation. In a cool environment, kraut can continue fermenting slowly for months. In the summer or in a heated room, its life cycle is more rapid; eventually it can become soft and mushy.
- Enjoy your kraut! I start eating it when the kraut is young and enjoy its evolving flavour over the course of a few weeks (or months in a large batch). Be sure to try the sauerkraut juice that will be left after the kraut is eaten. Sauerkraut juice packs a strong flavour, and is unparalleled as a digestive tonic or hangover cure.
�վ����…
Surface growth -��The most common problem that people encounter in fermenting vegetables is surface growth of yeasts and/or moulds, facilitated by oxygen. Many books refer to this as “scum,” but I prefer to think of it as a bloom. It’s a surface phenomenon, a result of contact with the air. If you should encounter surface growth, remove as much of it as you can, along with any discoloured or soft kraut from the top layer, and discard. The fermented vegetables beneath will generally look, smell, and taste fine. The surface growth can break up as you remove it, making it impossible to remove all of it. Don’t worry.
Develop a rhythm -��Start a new batch before the previous one runs out. Get a few different flavours or styles going at once for variety. Experiment!
Variations -��Add a little fresh vegetable juice and dispense with the need to squeeze or��pound. Incorporate mung bean sprouts . . .hydrated seaweed . . . shredded or quartered��brussels sprouts... cooked potatoes (mashed, fried, and beyond, but always cooled!) . . . dried or fresh fruit... the possibilities are infinite . . .
��
��
��
THE BRINING TECHNIQUE
The dry-salting method used for sauerkraut works great when you shred or chop your vegetables, for only with lots of surface area exposed can the salt pull water out of the vegetables in order for them to ferment under their own juices. This results in the most concentrated vegetable flavor, but is impossible with whole vegetables, or large chunks. In this case, you need to cover the vegetables with a saltwater solution known as brine.
You want to mix the brine fairly strong, since it will be diluted by the vegetables that go into it. Although brining proportions vary, 5 percent is a good starting point, meaning 5 percent by weight or 50 grams per litre. That translates to about 3 tablespoons��of salt per litre, a bit more with fine salt, a bit less with coarse. Stir well for several minutes until the salt is fully dissolved.
While 5 percent salt would be extremely salty in sauerkraut, a 5 percent brine yields a much lower-salt product, because once the vegetables go into the brine, they absorb salt and release juices, thereby diluting the salt concentration by more than half. Estimate required brine quantity as about half the volume of your vessel. Add as little brine as possible to the vegetables, packing them tightly and pressing down under brine. Salt in brine will pull water from the vegetables, and the amount of brine will increase.��
Salt will��diffuse into vegetables gradually. Taste the brine after a day or two and adjust the salt by adding more, if necessary, or adding water if the brine is too salty. A general rule of thumb to consider in salting your ferments: more salt to slow microorganism action in summer heat; less salt in winter when microbial action slows.
��
SOUR PICKLES:
Growing up in New York City, experiencing my Jewish heritage largely through food, I developed a taste for sour pickles. These pickles were very different from most of what is sold in stores as pickles, and even what home canners pickle, which are preserved in vinegar. These too are pickles, which encompass anything preserved in an acidic medium, but my idea of a pickle is one fermented in a brine and preserved by lactic rather than acetic acid.
Pickle-making requires close attention. My first attempt at brine-pickling resulted in soft, mushy pickles that were unappealing, because I abandoned the project for a few days, and perhaps because the brine was not salty enough, and because of the heat of the Tennessee summer. And and and. “Our perfection lies in our imperfection.” There are, inevitably, fermentation failures. We are dealing with fickle life forces, after all.
I persevered, though, compelled by a craving deep inside me for the yummy garlic-dill sour pickles of Guss’s pickle stall on the Lower East Side of Manhattan and Zabar’s on the Upper West Side. As it turns out, brine pickles are easy. You just need to keep the fermentation short in summer heat, when cucumbers are most abundant. In a cool (below roughly 18°C) place they can slowly ferment for weeks or even months. But in a very hot place, they may sour after just a few days and can start getting soft and mushy in less than a week.
One quality prized in a good pickle is crunchiness. It is enzymes activated by heat that break down the crunchiness. Salt slows them down, as do tannins, found on fresh grape leaves (and many others), frequently placed in the jar to help keep pickles crunchy. I recommend using them if you have access to grapevines. I’ve also had good results��using horseradish leaves, sour cherry leaves, oak leaves, and tea bags!
One other variable in pickle-making is cucumber size. I prefer pickles from small to medium cucumbers; pickles from big ones can be tough and often hollow in the middle.
��
Timeframe: 4 days to 2 weeks, depending upon temperature
Vessel: 1-litre jar (or for larger batches a larger jar or ceramic crock)
Ingredients (for 1 litre):
- 500 grams small unwaxed pickling cucumbers
- 1½�� tablespoons sea salt
- 1 or 2 heads fresh flowering dill, or 1–2 tablespoons any form of dill (fresh or dried leaf or seeds)
- 1–2 heads garlic
- 1 small handful fresh grape, cherry, oak, and/or horseradish leaves (if available)
- 1 pinch whole black peppercorns
��
Method:
- Prepare the cucumbers. Rinse the cucumbers, taking care to not bruise them, and making sure their blossoms are removed. Scrape off any remains at the blossom end. If you’re using cucumbers that aren’t fresh off the vine that day, soak them for a couple of hours in very cold water to freshen them.
- Mix the brine. Dissolve the sea salt in 500 ml of dechlorinated water to create a brine solution. Stir until the salt is thoroughly dissolved.
- Fill the vessel. Clean the vessel, then place at the bottom of it dill, garlic, fresh grape leaves, and black peppercorns. Pack whole cucumbers in the vessel, tightly to help them remain submerged under the brine.
- Add the brine. If the brine doesn’t cover the cucumbers, add more brine mixed at the same ratio of ¾ tablespoon/12 grams salt to 250 ml water. If the cucumbers are floating at the surface, an easy solution is to cut a chunk of a bigger cucumber to hold the others down, or to cut the top of a plastic food container a little bigger than the mouth of the jar, squeeze it through the mouth of the jar, and use it to hold the cucumbers submerged. If you’re using a crock, use a plate to weigh down the cucumbers, and cover it with a cloth to keep out dust and flies. With a jar, loosely seal the jar with its lid.
- Ferment.��Leave the pickles until the colour of the cucumbers changes from bright green to a duller olive green. Then taste every day or two. Sourness will develop over time, how fast depending primarily upon temperature. If any white surface scum appears, skim it from the surface, but don’t worry if you can’t get it all. Enjoy the pickles as they continue to ferment. Continue to check them regularly. If they start to get soft, or you don’t wantthem to get any sourer, move them to the fridge.
��
��
��
A FRUIT FERMENTATION
BLUEBERRY KVASS:
This is a fermented infusion of blueberries in water, with sugar. Blueberry kvass is fruity and delicious, great as a soft drink or as a cocktail mixer. Try varying it with strawberries, cherries, raspberries, mulberries, or other berries.
Timeframe: 3 to 5 days
Vessel: 4-litre (or larger) ceramic crock, bowl, wide-mouth jar, or food grade plastic bucket with lid or cloth cover
Ingredients (for 2 liters):
- 500 grams blueberries (or more if you have a great abundance!)
- 125 grams sugar (any form)
��
Method:
- Clean the strawberries. Gently rinse the berries and pick over them to remove any that are unripe or decomposing. Place the berries in your vessel.
- Mix the sugar solution. ��Measure about 1.5 litres of dechlorinated water. Add the sugar to the water and stir well to dissolve. Taste and add more sugar if you like it sweet.
- Pour the sugar solution over the berries. The vessel should only be about half full, with plenty of room to stir vigorously.
- Cover the vessel and leave to ferment.
- Stir. as often as you think of it, at least two to three times per day. Stir vigorously around the sides and try to form a vortex in the middle. A vortex aerates the water, and the stirring distributes activity and gets floating fruit submerged. Without stirring, the fruit may mould and fermentation will develop more slowly.
- Observe. After a few days, you will begin to notice bubbles. Keep stirring and they will get more active. By the time bubbling is vigorous the colour has changed, the berries have shrunk, and the liquid has a strong fruity flavour and aroma.
- Enjoy blueberry kvass either strained, with still-flavourful fruit on the side, or with the berries still in.
��
Recipes are adapted from Wild Fermentation, Updated and Revised Edition (Chelsea Green Publishing 2016). Copyright ©2016 by Sandor Ellix Katz and reprinted with permission from the publisher.
Credits
| Role | Contributor |
|---|---|
| Presenter | Dan Saladino |
| Interviewed Guest | Sandor Ellix Katz |
| Producer | Rich Ward |
Broadcasts
 Sun 5 Nov 2017 12:32�鶹Լ�� Radio 4
- Mon 6 Nov 2017 15:30�鶹Լ�� Radio 4
Download this programme
Subscribe to this programme or download individual episodes.
Can comfort foods really make you feel better?
Yes they can, says Sheila Dillon.
Podcast
-
![]()
The Food Programme
Investigating every aspect of the food we eat